Why Grow Microgreens at Home
Microgreens are young vegetable greens harvested just after sprouting, valued for their flavor and nutrient density. Growing microgreens at home is fast, space-efficient, and cost-effective compared with store-bought options.
Homegrown microgreens improve meals, provide fresh greens year-round, and are a low-risk project for beginners. This guide shows practical steps you can follow in any small kitchen or balcony.
What You Need to Grow Microgreens at Home

Before you start, gather basic supplies. You don’t need expensive equipment to get consistent results.
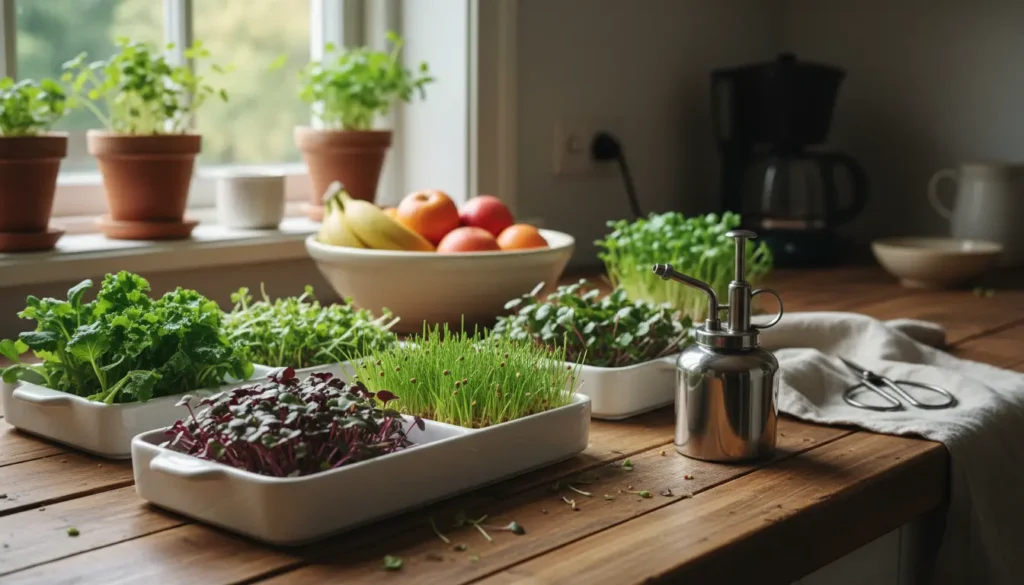
- Seeds: microgreen-specific seeds or untreated salad seeds (broccoli, radish, sunflower, basil)
- Shallow trays with drainage or seed trays without drainage plus a bottom tray
- Growing medium: seed-starting mix, coconut coir, or potting soil
- Light: sunny windowsill or a full-spectrum LED grow light
- Watering tools: spray bottle or gentle pourer
How to Grow Microgreens at Home: Step-by-Step
This step-by-step method works for most microgreen varieties and fits in small spaces.
1. Prepare the Tray and Medium
Fill a shallow tray with 1 to 1.5 inches of moisture-retentive medium. Smooth the surface so seeds contact the soil evenly.

Moisture is crucial early on, so wet the medium lightly before sowing to make it slightly damp but not waterlogged.
2. Sow Seeds
Sow seeds evenly across the tray. For dense microgreens like broccoli, use a thicker sowing; for larger seeds like sunflower, space them more loosely.
Press seeds gently into the medium to ensure contact, but don’t bury them deeply. Most microgreens need light or very shallow covering to germinate.
3. Cover and Germinate

Cover the tray with a second tray, a humidity dome, or a light cardboard to encourage germination. Keep covered for 2–5 days depending on the seed type.
Check daily and mist lightly if the medium feels dry. Remove the cover when you see sturdy sprouts and green tips.
4. Provide Light and Airflow
Place trays under a sunny window or a grow light. Microgreens need 10–16 hours of light daily for compact growth.
Rotate trays for even light distribution and maintain good airflow to reduce mold risk. A small fan on low can help in enclosed spaces.
5. Watering and Care
Water from the bottom or mist from above. Bottom-watering (placing trays in a shallow water bath for a few minutes) prevents damping-off and keeps stems strong.
Avoid overwatering; soggy medium invites mold. Use a spray bottle for gentle, even moisture if top-watering.
6. Harvesting Microgreens at Home
Most microgreens are ready in 7–21 days when first true leaves appear. Harvest with clean scissors, cutting above the soil line.
Rinse gently and dry in a salad spinner or on paper towels if not using immediately. Use microgreens fresh for best flavor and nutrition.
Best Seeds and Timelines to Grow Microgreens at Home
Choose seeds with reliable germination and flavor. Here are quick timelines for common varieties:
- Broccoli: 7–10 days
- Radish: 5–8 days
- Sunflower: 8–12 days
- Basil: 10–21 days
- Pea shoots: 10–14 days
Troubleshooting and Common Problems
Many issues are easy to fix if you check conditions regularly.
- Mold or fuzzy white growth: improve airflow, reduce humidity, use sterilized trays and fresh medium.
- Leggy stems: increase light intensity or shorten distance to grow light.
- Poor germination: check seed freshness and sowing depth; soak larger seeds overnight before sowing.
Microgreens can contain up to 40 times more nutrients by weight than their mature counterparts, depending on the variety. They deliver concentrated vitamins and antioxidants in a tiny serving.
Storage and Using Microgreens
Stored properly, harvested microgreens last 5–10 days in the refrigerator. Place loosely in a breathable container lined with a paper towel to absorb excess moisture.
Use microgreens as garnishes, in salads, sandwiches, smoothies, or as a nutrient boost on cooked dishes. They add flavor, crunch, and visual appeal.
Small Case Study: A Beginner’s First Month
Anna, a city apartment dweller, started with a 10×20 inch tray and broccoli seeds. She followed the steps above, using a windowsill and a cheap LED light when needed.
Her first tray produced a full harvest in 9 days. After three cycles, she reported lower grocery bills for greens and used microgreens daily in breakfasts and lunch bowls.
Lessons learned: sanitize trays between cycles, avoid overwatering, and try different seeds to find preferred flavors.
Quick Tips to Grow Microgreens at Home Successfully
- Start with forgiving varieties like broccoli and radish.
- Use quality seeds labeled for microgreens when possible.
- Maintain consistent light and moderate humidity.
- Sanitize trays and tools between crops to avoid pests and disease.
- Record sowing dates and harvest times to refine timing for your environment.
Final Thoughts on How to Grow Microgreens at Home
Growing microgreens at home is a straightforward way to add fresh, nutrient-dense greens to your diet. The low space and time investment make it an ideal starter project for new gardeners.
Start small, keep records, and adjust light or watering until you find a routine that works in your home. With a few cycles, you’ll develop reliable yields and discover favorite varieties to grow regularly.


