Fresh herbs can transform home cooking and are easy to grow with a simple plan. This guide explains how to start a kitchen herb garden in small spaces and keep it productive year-round.
Why choose a kitchen herb garden
A kitchen herb garden gives you quick access to fresh flavors and cuts grocery costs. It also improves indoor air quality and adds a green accent to countertops or windowsills.

For beginners, herbs are forgiving and require less space than vegetables. You can grow many popular herbs in pots on a sunny shelf or window ledge.
Benefits of a kitchen herb garden
- Fresh herbs when you need them, reducing waste from store-bought bunches.
- Lower long-term cost than buying herbs regularly.
- Educational and relaxing—caring for plants supports wellbeing.
What you need to start a kitchen herb garden
Gather a few basic items before planting to prevent common mistakes. Good materials make setup quick and avoid transplant shocks.
- Pots or containers with drainage holes—6 to 8 inch pots work for most herbs.
- Quality potting mix that drains well; avoid garden soil for indoor pots.
- Seeds or small seedlings from a reputable nursery.
- Fertilizer, a watering can, and a light source if natural light is limited.
Choosing containers and soil
Terracotta pots breathe well but dry faster; plastic retains moisture longer. Use saucers to protect surfaces from drips.

Mix in perlite or coarse sand for improved drainage if the potting mix seems dense. Herbs do not like standing water.
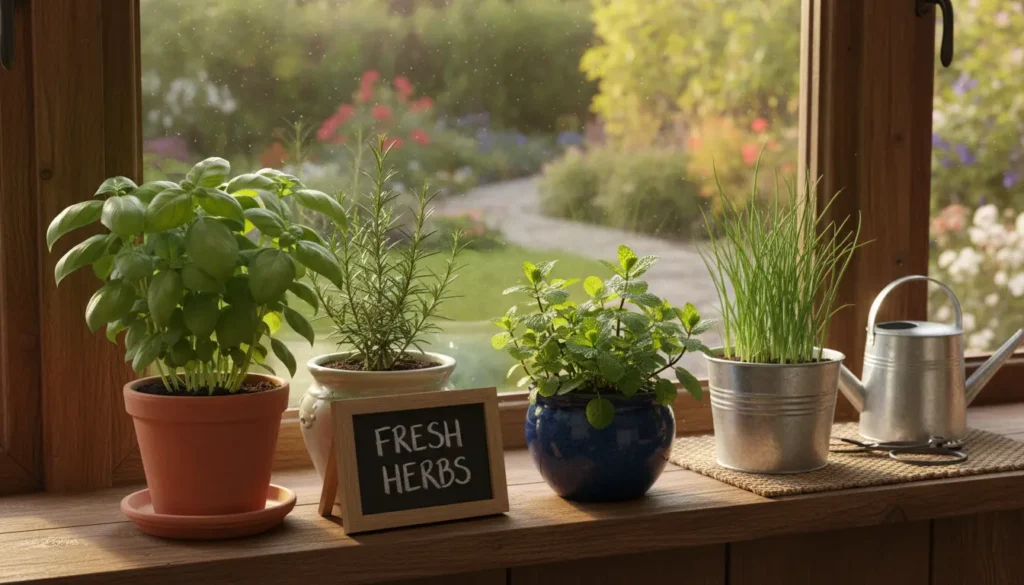
Choosing plants for your kitchen herb garden
Select herbs that suit your cooking and light conditions. Start with easy, commonly used varieties to build confidence.
- Basil: Best with 6+ hours of direct light; good in pots.
- Parsley: Tolerates partial shade and is biennial, usually grown as an annual.
- Mint: Aggressive spreader—grow in its own pot to avoid overtaking others.
- Rosemary: Needs bright light; handle sparingly indoors as it prefers drier soil.
- Thyme and oregano: Low-water, sun-loving herbs that are easy to maintain.
Step-by-step setup for a kitchen herb garden
Follow a simple routine to establish your kitchen herb garden and reduce early failures. Small steps prevent overwatering and overcrowding.
- Pick a location with the most natural light—south or west facing windows are ideal.
- Prepare pots with drainage holes and add a layer of small stones or mesh to keep holes clear.
- Fill pots with potting mix, leaving about an inch below the rim for watering space.
- Plant seedlings at the same depth they were in their nursery containers and firm soil gently around roots.
- Water thoroughly after planting and allow excess to drain. Check soil moisture daily for the first week.
Placement and lighting tips

Rotate pots weekly so all sides receive light. If you lack sufficient sunlight, use a LED grow light for 10–12 hours daily.
Group plants with similar light and water needs to simplify care. For example, keep basil and parsley together but separate mint and rosemary.
Care and maintenance for a kitchen herb garden
Maintenance is straightforward: water, trim, and monitor for pests. Consistent routines keep herbs healthy and productive.
- Watering: Check soil with your finger; water when the top inch is dry. Avoid overwatering to prevent root rot.
- Fertilizing: Use a balanced liquid fertilizer every 4–6 weeks at half strength during the growing season.
- Pruning: Regularly pinch or trim stems to encourage bushy growth and prevent flowering for many herbs like basil.
- Pest control: Wipe leaves or use a gentle insecticidal soap for aphids. Most indoor herbs rarely face heavy infestations.
Harvesting from a kitchen herb garden
Harvest herbs in the morning for best flavor, and only take up to one-third of the plant at a time. Frequent small harvests keep plants productive.
For leafy herbs, pinch leaves at a node to encourage branching. For woody herbs like rosemary, cut sprigs from the outer growth.
Storing and preserving herbs
Use fresh herbs within a few days for peak flavor. Store leafy herbs loosely wrapped in a damp paper towel in the fridge for up to a week.
For long-term storage, freeze chopped herbs in ice cube trays with olive oil, or dry herbs in a low oven or dehydrator.
Real-world example: small apartment success
Case study: Sarah, a city renter with limited space, started a kitchen herb garden on a narrow south-facing windowsill. She used three 6-inch pots for basil, parsley, and mint.
Within six weeks, regular pinching and a weekly liquid feed produced enough basil for fresh pesto twice a month and parsley for weekly salads. Separating mint into its own pot stopped it from overtaking the others.
Troubleshooting common issues in a kitchen herb garden
Yellow leaves often indicate overwatering or poor drainage. Move the pot to brighter light and let soil dry to correct this.
Leggy, pale growth usually signals insufficient light. Increase daily light exposure or use a grow light to restore compact growth.
Starting a kitchen herb garden is affordable and rewarding. With appropriate containers, good soil, and a consistent care routine, you can enjoy fresh herbs year-round from a small indoor space.
Quick checklist to get started: choose a sunny spot, select 2–4 easy herbs, use quality potting mix, and water only when the top inch of soil is dry. Keep a small journal to note what each herb prefers and adjust care accordingly.


