Why start composting at home?
Composting turns food scraps and yard waste into nutrient-rich soil. It reduces household waste and improves garden health without expensive inputs.
Starting composting at home is accessible for apartments and houses alike. This guide gives clear steps, materials lists, and troubleshooting tips to get you composting effectively.
Home composting basics

Home composting relies on a balance of ‘greens’ (nitrogen-rich materials) and ‘browns’ (carbon-rich materials). Microbes break these down into humus if the pile stays moist and aerated.
There are two main approaches: hot composting for faster results and cold composting for low-maintenance. Choose the method that fits your time and space.
What you can compost at home
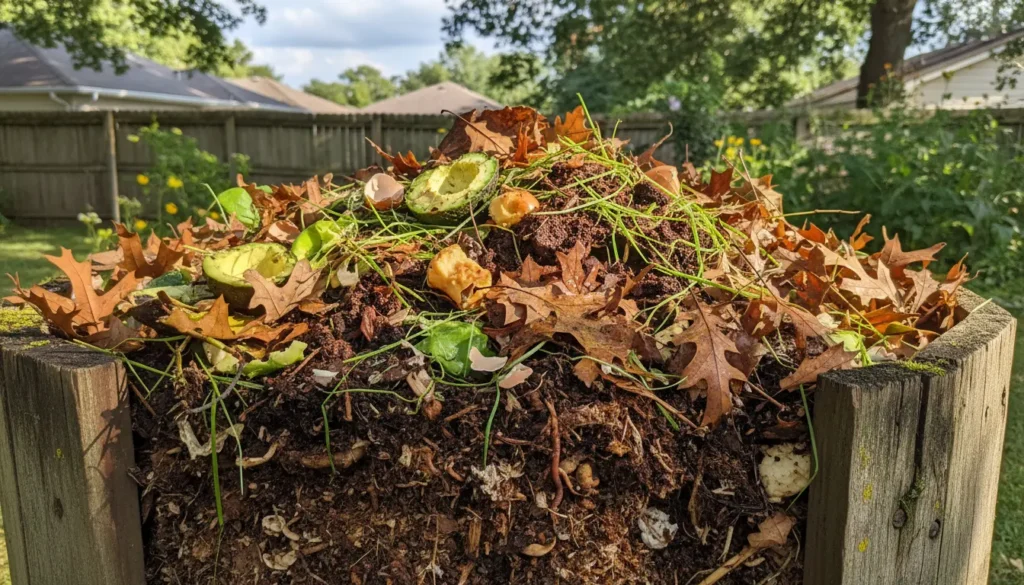
- Greens: fruit and vegetable scraps, coffee grounds, fresh grass clippings.
- Browns: dry leaves, shredded paper, cardboard, straw, small wood chips.
- Other: eggshells, hair, pet fur, and well-aged wood ash in small amounts.
What to avoid
- Meat, fish, dairy, and oily foods (they attract pests).
- Diseased plant material and invasive weeds with seeds or roots.
- Coal ash, synthetic chemicals, and treated wood products.
How to start composting at home: Step-by-step
Follow these practical steps to set up a compost system that works for you.
1. Pick a system

Choose between a simple pile, a covered bin, or a worm (vermicompost) system. Bins are tidy and good for small yards, while worm bins suit indoor or apartment setups.
2. Choose a location
Place your compost in a partly shaded spot with good drainage. For indoor worm bins, keep them in a cool area away from direct heat.
3. Build the pile or fill the bin
Start with a 4–6 inch layer of browns to help aeration. Add a mix of greens and browns in roughly equal volumes, or aim for a carbon-to-nitrogen ratio near 25–30:1 for faster decomposition.
4. Maintain moisture and aeration

The pile should feel like a wrung-out sponge — moist but not dripping. Turn the pile every 1–2 weeks for hot composting. For worm bins, aerate lightly and avoid over-wetting.
5. Monitor and harvest
In a hot compost pile you can see compost ready in 2–3 months. Cold composting may take 6–12 months. Finished compost looks dark, crumbly, and smells earthy.
Troubleshooting common problems
If the pile smells bad, add more browns and turn it to add air. A dry pile needs water and fresh greens. If it’s not breaking down, add nitrogen-rich materials and increase surface area by shredding inputs.
Quick fixes
- Smelly compost: add dry leaves or shredded paper and turn more often.
- Too wet: mix in straw, cardboard, or dry leaves and leave the lid off to dry slightly.
- Slow breakdown: chop materials smaller, keep the pile warm, and ensure moisture is adequate.
Small case study: Apartment worm bin success
A two-person apartment household started a 10-liter worm bin under the sink. They added fruit and vegetable scraps and a handful of dry shredded paper twice a week.
Within three months they were producing 1–2 liters of compost every month and reduced their kitchen waste by about 60 percent. They used the finished compost on potted herbs and noticed stronger growth and healthier leaves.
Practical tips for different living situations
Small yards
Use a closed bin to keep pests out and speed decomposition. Layer materials and rotate sections if using a bin with removable sides.
Apartments and balconies
Worm bins or small bokashi systems work well indoors. Bokashi ferments food waste and requires a short burial or soil treatment afterward.
Large gardens
Consider multiple long windrows or a hot compost system to handle larger volumes of yard waste. Use a compost thermometer to monitor temperature for best results.
How to use finished compost
- Top-dress lawns and garden beds with a thin layer of compost.
- Mix compost into potting mixes to improve structure and water retention.
- Make compost tea by steeping finished compost in water for a gentle liquid feed.
Final checklist to start composting at home
- Choose a composting method (pile, bin, worm, or bokashi).
- Collect greens and browns separately for easier mixing.
- Maintain moisture and aeration; turn or aerate as needed.
- Monitor for pests, odors, and moisture issues and adjust accordingly.
- Harvest finished compost and apply it to your plants.
Starting composting at home is a simple way to reduce waste and improve your soil. With a little regular attention and the right balance of materials, you can create rich compost that benefits plants and the environment.


