Home composting turns kitchen scraps and yard waste into a useful soil amendment. This guide gives clear, practical steps for home composting for beginners so you can start composting easily and avoid common mistakes.
Why try home composting for beginners
Composting reduces household waste and produces nutrient-rich compost for gardens or potted plants. For beginners, it is an affordable, low-tech way to improve soil structure and retain moisture in planting beds.
Key benefits of home composting for beginners
- Reduces trash and disposal costs.
- Improves soil fertility and structure.
- Supports water retention and reduces erosion.
- Encourages a circular use of household organics.
How to set up home composting for beginners

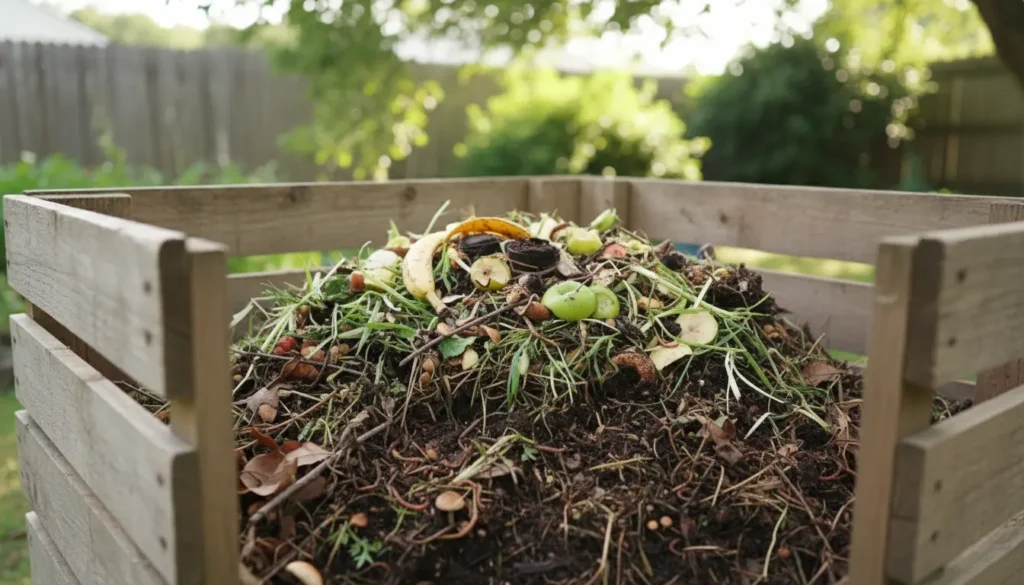
Setting up a basic compost system requires choosing a container, selecting a location, and understanding simple turning and balancing routines. You do not need expensive equipment to get started.
Choose a compost container
Options include a simple pile, tumblers, or a ready-made bin. A closed bin reduces pests and looks tidier, while an open pile is the cheapest option.
Pick the right spot
Place the compost near your kitchen or garden for convenience. Choose a partly shaded, well-drained area to keep the pile from drying out or becoming waterlogged.
Start layering and balancing

Compost needs a mix of carbon-rich “browns” and nitrogen-rich “greens.” Aim for roughly a 3:1 ratio by volume of browns to greens for a steady decomposition rate.
- Browns: dry leaves, shredded paper, straw, cardboard.
- Greens: vegetable scraps, coffee grounds, fresh grass clippings.
Layer materials in thin layers, then lightly moisten. Avoid compacting; air is necessary for aerobic decomposition.
What to compost and what to avoid
Knowing which materials are safe is essential for healthy compost and fewer odors or pests. This section helps beginners decide what to add and what to keep out.
Acceptable materials
- Fruit and vegetable scraps (small pieces compost faster).
- Eggshells, coffee grounds, tea bags (remove staples).
- Yard waste like leaves, plant trimmings, and untreated wood chips.
Materials to avoid
- Meat, dairy, oily foods — attract pests and cause odors.
- Diseased plants or invasive weeds — can survive the compost process in small piles.
- Pet waste from carnivores — contains pathogens not suitable for garden compost.
Maintenance and troubleshooting for home composting for beginners

Routine checks make composting simple. The most common tasks are turning the pile, monitoring moisture, and adjusting the green-to-brown balance.
Turning and aeration
Turn the pile every 1–3 weeks to keep decomposition aerobic. If you use a tumbler, rotate according to manufacturer guidance. Good aeration reduces smells and speeds breakdown.
Moisture and temperature
The compost should be as damp as a wrung-out sponge. Too dry slows decomposition; too wet leads to odors. A hot center (120–160°F / 50–70°C) indicates active decomposition in larger systems, but cold piles will still compost slowly over months.
Common problems and fixes
- Smell of ammonia — add more browns and turn the pile.
- Pests — bury food scraps in the center and use a closed bin or wire mesh.
- Slow decomposition — chop materials smaller and balance greens and browns.
Compost can improve soil water retention by up to 20 percent in sandy soils and helps unlock nutrients in clay soils. Even small amounts mixed into potting soil boost plant health.
Speeding up results and using finished compost
To accelerate composting, increase surface area by chopping scraps, keep a good green/brown ratio, and maintain moisture and aeration. Add a handful of finished compost or garden soil to introduce microbes.
When is compost ready?
Finished compost is dark, crumbly, and smells earthy. It usually takes 2–12 months depending on the system and management. Sift coarse materials for a fine texture if you plan to use it in seed mixes or potting blends.
Small real-world example
Case study: Sarah, an apartment balcony gardener, started a small compost bin with a sealed kitchen caddy and a 20-gallon tumbler. She logged kitchen scraps and shredded cardboard. After six months of weekly turning and adding dry leaves, she produced 15 liters of dark compost, enough to top dress three balcony planters and reduce her weekly kitchen waste by nearly 40 percent.
This example shows that even small setups can yield useful compost and reduce waste when maintained consistently.
Final tips for home composting for beginners
Start small and be consistent. Learn by doing: monitor the pile, adjust ratios, and don’t be afraid to experiment with different materials.
- Keep a small kitchen caddy to collect scraps and empty it daily.
- Shred or chop large pieces to speed decomposition.
- Record results to learn what mix works best in your climate.
With simple habits and occasional maintenance, home composting for beginners is an achievable way to reduce waste and build healthier soil for your plants.


