Why Home Composting Matters
Home composting turns kitchen scraps and yard waste into a valuable soil amendment. It reduces household waste, lowers landfill methane, and improves garden soil health.
For beginners, composting is a low-cost way to close the nutrient loop and support healthier plants. This guide focuses on simple, practical steps to get started and avoid common mistakes.
Home Composting Basics

Composting relies on microbes breaking down organic matter. That process needs three essentials: carbon, nitrogen, and moisture.
Carbon-rich materials (browns) and nitrogen-rich materials (greens) must be balanced. Good air flow and occasional turning speed decomposition.
Key materials to use
- Greens: vegetable scraps, coffee grounds, fresh grass clippings.
- Browns: dry leaves, shredded paper, straw, small wood chips.
- Avoid: meat, dairy, oily foods, diseased plants, and pet waste.
Basic carbon to nitrogen guideline
Beginner-friendly rule: aim for a mix that looks balanced, roughly 25–30 parts carbon to 1 part nitrogen. You can simply layer browns and greens if you do not measure precisely.
Choosing a System for Home Composting

Select a compost system that fits your space, time, and effort level. Options vary from simple piles to contained tumblers and worm bins.
Common systems
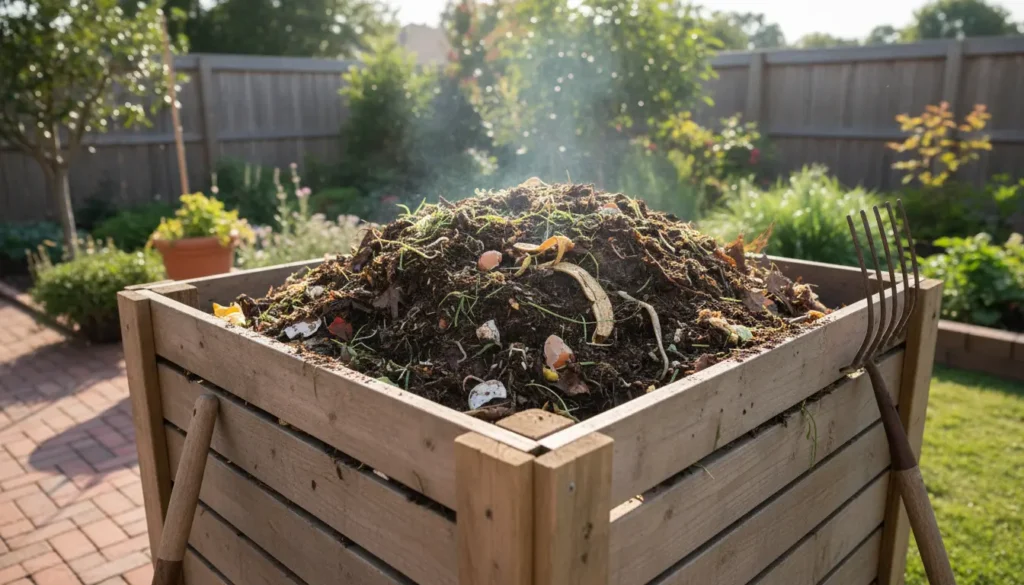
- Open pile: Cheapest and simplest, best for yards with space.
- Compost bin: Contained and tidy, available in plastic or wood designs.
- Tumbler: Easier to turn, faster results in small yards.
- Vermicomposting (worm bin): Good for apartment dwellers or small kitchens.
Step-by-Step Start Guide for Home Composting
Follow these practical steps to set up a reliable compost system. Keep routines simple to stay consistent.
- Choose a location: a level, partly shaded spot near a water source is ideal.
- Pick a container: match the system to your space and how much effort you want to spend.
- Prepare the base: add coarse browns like straw or small branches to help airflow.
- Add materials in layers: alternate greens and browns and chop larger items to speed breakdown.
- Maintain moisture: aim for a damp sponge consistency. Add water in dry weather.
- Turn occasionally: every 1–3 weeks for active piles; tumblers may be turned more often.
Quick start checklist
- Container or pile in suitable location
- Mix of greens and browns
- Basic tools: pitchfork or compost aerator, thermometer (optional)
- Patience: initial breakdown can take weeks to months
Composting can divert up to 30% of household waste from the trash and reduce methane emissions from landfills.
Troubleshooting Common Problems

Problems usually come down to imbalance of materials, lack of air, or incorrect moisture. Most issues are easy to fix with a few adjustments.
Bad smells
Smells indicate too much nitrogen or poor aeration. Add dry browns, turn the pile to add air, and reduce wet food scraps until smells subside.
Slow decomposition
If things are slow, chop materials smaller and add more greens or water to help microbes. Turning the pile speeds up the process by improving oxygen flow.
Pests
To avoid rodents and flies, bury food scraps under a layer of browns, use a closed bin, or vermicompost indoors. Never add meat or dairy to open piles.
Using Finished Compost
Finished compost looks dark, crumbly, and smells earthy. You can use it in planting beds, potted mixes, or as a light top dressing around plants.
Apply a 1–2 inch layer to garden beds or mix 10–25% compost into potting soil to boost nutrients and water retention.
Benefits to expect
- Improved soil structure and drainage
- Increased microbial life and nutrient availability
- Reduced need for chemical fertilizers
Real-World Example: A Small Yard Case Study
Maria, a homeowner in Portland, began a 100-liter compost bin in her backyard. She collected kitchen scraps and yard trimmings over one summer.
After four months of layering, occasional turning, and adding dry leaves, she produced about 60 liters of finished compost. Maria used it to top-dress her vegetable beds and reported healthier tomatoes and better water retention through late summer.
Tips to Keep Composting Long Term
Keep collection simple: a small countertop container for scraps and a larger outdoor bin for processing. Empty the countertop daily to avoid odors.
Make composting part of routine chores: turn the bin during yard work or watering days. Track progress with a simple log if you want to optimize speed.
Tools and supplies worth having
- Sturdy compost bin or tumbler
- Pitchfork or compost aerator
- Kitchen scrap caddy with a tight lid
- Gloves and a garden thermometer (optional)
Final Checklist for Home Composting Beginners
- Choose the right system for your space
- Balance greens and browns, keep moisture steady
- Turn periodically and troubleshoot odors or pests quickly
- Use finished compost to improve soil and reduce fertilizer needs
With simple choices and small routines, home composting becomes an effective habit. Start small, observe results, and scale up as you gain confidence.


