Composting at home turns kitchen and yard waste into rich soil that improves plants and cuts trash. This guide shows practical steps you can follow today, whether you have a backyard or an apartment balcony.
Why composting at home matters
Composting reduces the amount of organic waste sent to landfills and lowers methane emissions. It also produces nutrient-rich soil that improves plant health and water retention.

For many households, composting cuts weekly trash volume and saves money on store-bought soil amendments.
How to start composting at home: basic options
Choose a method that fits your space and schedule. The three common options are backyard bin, tumbler, and indoor vermicompost (worm bin).
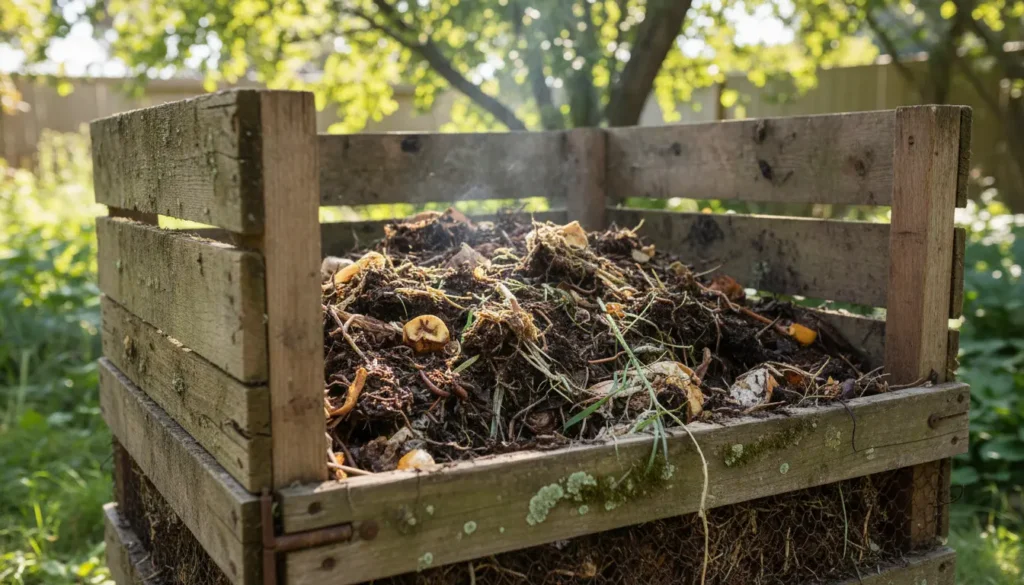
Backyard compost bin
Backyard bins are simple and low-cost. Use a plastic or wooden bin with ventilation, or pile compost in a corner of the yard.

They work well if you have yard waste and moderate kitchen scraps.
Compost tumbler
Tumblers speed up decomposition because you turn them easily. They keep pests out and are neater for small yards.
They require regular turning — about once every few days — for best results.
Vermicompost (worm bin)

Indoor worm bins are ideal for apartments and people who want fast, high-quality compost. Red wigglers (Eisenia fetida) eat kitchen scraps and produce castings.
Worm bins need stable indoor temperatures and occasional maintenance to prevent odors.
What to put in a home compost
Good compost needs a balance of carbon-rich “browns” and nitrogen-rich “greens.” Aim for a rough 30:1 carbon to nitrogen ratio by weight.
- Greens (nitrogen): vegetable peels, fruit scraps, coffee grounds, fresh grass clippings
- Browns (carbon): dry leaves, straw, paper towels, shredded cardboard, wood chips
- Avoid: meat, dairy, oils, diseased plants, pet waste, and large bones
Step-by-step: setting up a simple backyard compost
Follow these steps to start a basic pile or bin that decomposes reliably.
- Pick a shaded, level spot with good drainage.
- Lay a 4-6 inch base of coarse browns like small branches or straw for airflow.
- Add kitchen scraps and garden waste in alternating layers of greens and browns.
- Moisten the pile so it feels like a wrung-out sponge; not soggy.
- Turn the pile every 1–2 weeks to add oxygen and speed decomposition.
Troubleshooting common composting problems
Compost often needs small fixes. Identifying the symptom usually points to a quick fix.
- Bad smell: pile is too wet or has too much green. Add browns, turn, and aerate.
- Not heating up: pile is too small, too dry, or low in nitrogen. Increase size, add water and greens.
- Fruit flies: cover fresh fruit scraps with a layer of browns and use closed bins or a kitchen caddy with a lid.
How long until compost is ready?
Time depends on method and maintenance. Hot, well-turned piles can be ready in 2–3 months. Passive piles or poorly aerated bins may take 6–12 months.
Finished compost is dark, crumbly, and earthy-smelling with no recognizable food bits.
Using finished compost
Apply finished compost to garden beds as a top dressing or mix it into potting soil. Use about 1–2 inches on beds and 10–20% by volume in potting mixes.
Compost improves soil structure, adds slow-release nutrients, and increases water retention.
Case study: apartment composting with a worm bin
Maria, a renter in a two-bedroom apartment, reduced her kitchen waste by about 60% in six months using a 10-gallon worm bin. She collected fruit and vegetable scraps in a small caddy and fed the bin every 2–3 days.
After four months, Maria harvested dark, fine worm castings and used them to refresh potted herbs. She reported fewer grocery costs for herbs and less smelly trash.
Composting one ton of food waste can reduce greenhouse gas emissions by roughly one ton of CO2 equivalent, depending on local waste systems.
Practical tips to keep composting at home
- Start small and scale up as you become comfortable with the process.
- Keep a small sealed caddy under the sink for daily scraps to avoid odors and attractants.
- Save shredded paper and dry leaves as a supply of browns.
- Label and rotate bins if you run multiple batches to manage timing and use.
Final checklist before you begin composting at home
- Choose a method that fits your space: bin, tumbler, or worm box.
- Gather initial materials: browns, greens, a water source, and a turning tool.
- Pick a location with good drainage and easy access.
- Plan for regular maintenance: turning, moisture checks, and occasional troubleshooting.
Composting at home is a low-cost, practical way to reduce waste and improve soil. With a few simple steps and some routine care, most households can produce useful compost within months.


