Home composting is an easy way to turn kitchen scraps and yard waste into rich soil for your garden. This guide explains practical steps to start home composting, what to include, and how to troubleshoot common problems.
Why Start Home Composting
Composting reduces household waste and returns nutrients to the soil. It also saves money on fertilizer and helps improve soil structure for healthier plants.

Beginners can set up a small system in weeks and see results within a few months with minimal effort.
Choosing a Compost Method for Home Composting
Selecting the right method depends on space, time, and how much material you generate. The three common options are backyard bins, tumblers, and vermicomposting with worms.
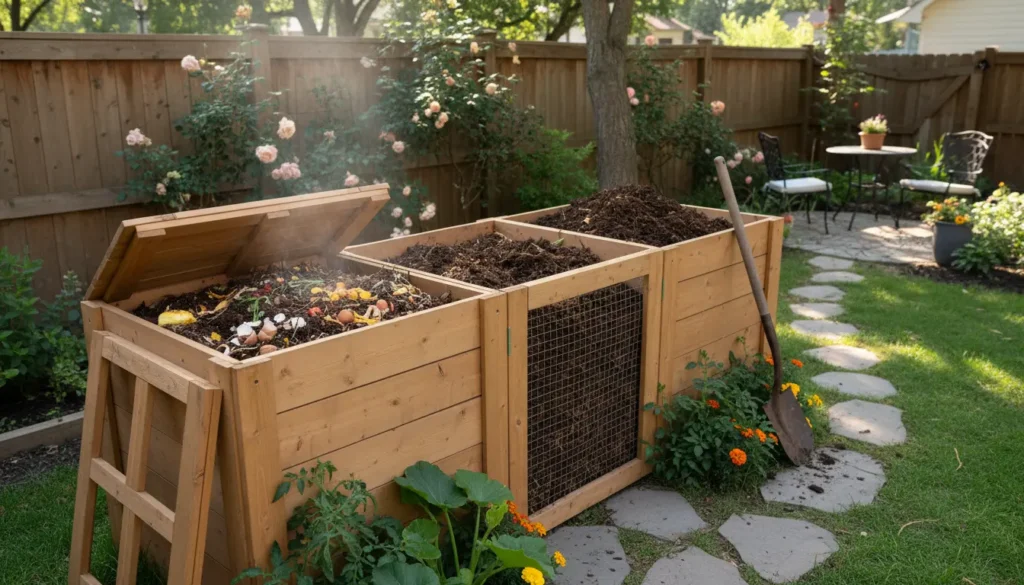
Backyard Compost Bin
A simple bin or pile is low-cost and low-maintenance. It is best when you have outdoor space and produce moderate amounts of yard and kitchen waste.
Compost Tumbler

Tumblers speed up decomposition and are cleaner for small yards or patios. They require regular turning but produce finished compost faster than a static pile.
Vermicomposting (Worm Bin)
Worm bins are ideal for apartments or limited outdoor space. Red wiggler worms consume kitchen scraps and produce nutrient-rich worm castings.
Materials to Use in Home Composting
Compost needs a balance of carbon (brown) and nitrogen (green) materials. Aim for roughly a 3:1 ratio of browns to greens by volume for a healthy pile.
- Green materials (nitrogen): vegetable peels, coffee grounds, fresh grass clippings, tea bags.
- Brown materials (carbon): dry leaves, shredded paper, cardboard, straw, wood chips.
- Do not add: meat, dairy, oils, diseased plants, pet waste.
Step-by-Step: How to Start Home Composting

Follow these practical steps to build a stable compost system at home.
- Pick a location: Choose a well-drained, partly shaded spot near water access if possible.
- Choose a container: Use a purchased bin, DIY pallet bin, or simply start a pile.
- Layer materials: Begin with coarse browns for airflow, then add alternating layers of greens and browns.
- Moisture and aeration: Keep the pile damp like a wrung-out sponge. Turn every 1–2 weeks for faster composting.
- Monitor temperature: A hot pile (120–160°F or 50–70°C) decomposes faster; smaller or cooler piles take longer.
- Harvest: Compost is ready when dark, crumbly, and earthy-smelling. Use it in garden beds or as potting mix amendment.
Quick Tips for Successful Home Composting
- Chop or shred materials to speed decomposition.
- Balance greens and browns to reduce odors and pests.
- Add finished compost gradually to improve soil biology.
Composting can reduce household waste by up to 30 percent. Even small-scale composting of kitchen scraps diverts significant organic material from landfills.
Troubleshooting Common Problems in Home Composting
New composters often run into a few predictable issues. Use these fixes to keep your system on track.
Bad Odor
Smelly compost usually means too much nitrogen or poor airflow. Add dry brown materials and turn the pile to introduce oxygen.
Pests and Flies
Avoid meat and dairy. Bury food scraps under a layer of brown material and secure the bin lid or use a closed tumbler if rodents are a problem.
Slow Decomposition
Ensure the pile is moist and has enough nitrogen. Chop materials smaller and turn the pile to speed up microbial activity.
Small Real-World Case Study: Apartment Vermicomposting
Emma, a city apartment renter, started a worm bin on her balcony using a plastic tote and red wiggler worms. She fed the bin coffee grounds, fruit and vegetable scraps, and shredded paper. Within three months she harvested dark, rich worm castings to pot houseplants.
Her key actions were keeping the bin shaded, maintaining moisture, and avoiding citrus and onion overload. Emma reduced her kitchen waste and stopped buying store potting mix for several plants.
Where to Use Finished Home Composting Material
Finished compost improves soil structure, water retention, and nutrient content. Use it as a top dressing, mix into garden beds, or add to potting mixes.
- Vegetable garden rows — mix 2–3 inches into topsoil before planting.
- Flower beds — apply as mulch around established plants.
- Potted plants — blend 1 part compost to 3 parts potting soil.
Final Checklist to Start Home Composting
- Choose a method that fits your space and time.
- Gather a mix of green and brown materials.
- Monitor moisture and aeration regularly.
- Adjust materials and turning schedule to avoid problems.
Home composting is a simple, rewarding practice that benefits gardens and reduces waste. Start small, observe changes, and adjust as you learn. With basic care, anyone can convert organic scraps into valuable soil in a few months.


