Why Grow Microgreens at Home
Microgreens are young vegetable greens harvested just after the cotyledon leaves have developed. They pack intense flavor and nutrients and take little space and time to grow.
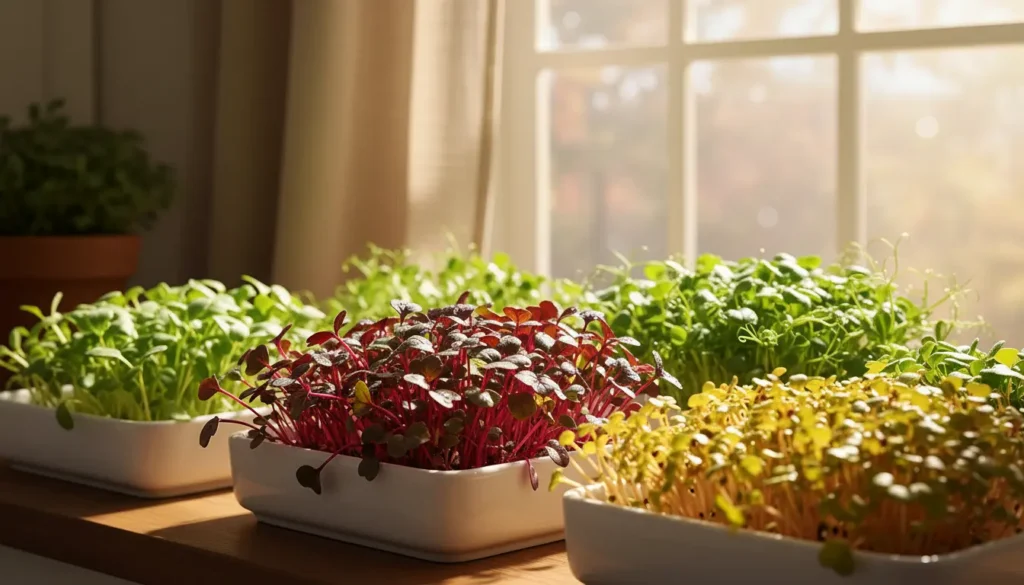
Growing microgreens at home gives you fresh, flavorful greens year-round, even on a windowsill. This guide shows practical steps to grow microgreens at home for beginners and busy gardeners.
What You Need to Grow Microgreens at Home

Microgreens require minimal equipment. Most supplies are inexpensive and reusable.
- Shallow trays or containers with drainage (10×20 inch or small seed trays work well)
- Growing medium: seed-starting mix, coconut coir, or a thin layer of potting soil
- Microgreen seeds (radish, arugula, broccoli, sunflower, pea)
- Spray bottle for watering
- Light source: bright window or LED grow light
- Scissors for harvesting
Choosing Seeds to Grow Microgreens at Home
Not all seeds are suited for microgreens. Choose seeds labelled for microgreen or salad use when possible to avoid treated seeds.
Common choices include:
- Radish: fast, spicy, 6–10 days
- Broccoli: mild, nutritious, 8–12 days
- Sunflower: large leaves, crunchy, 10–14 days
- Pea: sweet, hearty, 10–14 days
Step-by-Step: How to Grow Microgreens at Home

Follow these practical steps to grow microgreens at home with reliable results.
1. Prepare the Tray and Soil
Fill your tray with 1 to 1.5 inches of moistened growing medium. Level it so water distributes evenly.
2. Sow Seeds Evenly
Scatter seeds evenly across the surface. For small seeds use a light sprinkle; for larger seeds like sunflower or pea, place them slightly spaced so they don’t overcrowd.

Press seeds gently into the medium to ensure contact, but do not bury them deeply.
3. Cover and Keep Moist
Optionally cover the tray with another tray or a breathable lid for 2–4 days to encourage germination. Keep the medium consistently moist using a spray bottle.
4. Provide Light
After germination, move trays to a bright window or under a fluorescent/LED grow light. Microgreens need 10–16 hours of light per day for compact growth.
5. Watering and Ventilation
Water from the top with a fine mist or bottom-water by placing trays in a shallow pan for a few minutes. Avoid waterlogged soil to prevent mold.
Good air circulation helps prevent damping-off and mold. A small fan on low can improve airflow in enclosed spaces.
6. Harvest
Harvest when the first true leaves appear or when the greens reach 1–3 inches tall. Use scissors to cut just above the soil line.
Typical harvest times: 7–14 days depending on seed type and conditions.
Troubleshooting: Common Problems When You Grow Microgreens at Home
Microgreens are forgiving but some issues can appear. Here are quick fixes.
- Mold or fungal growth: Reduce humidity, improve airflow, and avoid overwatering.
- Leggy, pale seedlings: Increase light intensity or move trays closer to the light.
- Poor germination: Check seed quality and sowing depth; use fresh seeds and keep consistent moisture.
Storage and Uses
After harvest, wash and pat dry microgreens before refrigerating in a breathable container. Use within 5–7 days for best flavor and texture.
Use microgreens as garnish, in salads, sandwiches, and smoothies for a nutrient boost.
Some microgreens can contain up to 40 times the nutrient concentration of their mature counterparts by weight. A small tray can deliver a high amount of vitamins and antioxidants.
Real-World Example: Balcony Microgreens Case Study
Sara, an apartment resident, used two 10×10 inch trays on a sunny windowsill to grow radish and sunflower microgreens. She followed a simple routine: sow, mist twice daily, 12 hours of light from a window plus 4 hours under an LED light on cloudy days.
Results: radish ready in 8 days, sunflower in 12 days. Each tray yielded about 3–4 cups of fresh microgreens, enough for daily salads for two people for a week. Seed cost was under $5 per tray, making it a low-cost source of fresh greens.
Quick Tips to Improve Results When You Grow Microgreens at Home
- Label trays with seed type and sow date to track timing.
- Rotate seed types to discover favorite flavors and textures.
- Sanitize trays between uses with a mild bleach solution to prevent disease.
- Experiment with mixing seed varieties for unique flavors and colors.
Conclusion: Grow Microgreens at Home with Confidence
Growing microgreens at home is fast, space-efficient, and rewarding. With a few trays, quality seeds, and consistent light and moisture, you can harvest fresh greens in as little as one week.
Start small, keep notes, and adjust light and watering to suit your space. Within a few cycles you’ll refine a routine that fits your schedule and taste preferences.


